Table of Contents
GUI applications are essential in modern software development, providing an interactive and visually appealing way for users to engage with applications. Python, known for its simplicity and versatility, offers a robust toolkit called Tkinter for building GUI applications. Tkinter, which comes bundled with Python, provides a straightforward approach to creating desktop applications. This article delves into the fundamentals of Tkinter and guides you through building your own GUI applications, covering both basic and advanced aspects of the toolkit.
What is Tkinter in the Context of GUI Applications?
Tkinter is Python’s standard GUI (Graphical User Interface) package. It acts as a thin object-oriented layer over the Tk GUI applications toolkit, which is a popular interface library for creating GUI applications. Tkinter’s integration with Python makes it a practical choice for developers, as it is included with most Python installations and provides an extensive set of tools and widgets to build interactive desktop applications.
Key Features of Tkinter
- Ease of Use: Tkinter’s simplicity makes it an excellent choice for both beginners and experienced developers.
- Comprehensive Widget Set: Includes essential widgets like buttons, labels, and text fields, and advanced ones like canvases and frames.
- Cross-Platform Compatibility: Tkinter applications run on Windows, macOS, and Linux.
- Built-In Availability: Comes pre-installed with Python, eliminating the need for additional installation steps.
Getting Started with Tkinter
Installation
Tkinter is bundled with Python, so there’s no need for separate installation. If you’re using Python 3, Tkinter is ready to use. You can start by importing Tkinter into your script:
pythonCopy codeimport tkinter as tk
The Tkinter Window
The main window is the cornerstone of any Tkinter GUI application. Creating a basic window is simple and involves only a few lines of code:
pythonCopy codeimport tkinter as tk

# Create the main window
root = tk.Tk()

# Run the Tkinter event loop
root.mainloop()
This script creates a window that is resizable, minimizable, and closable. The mainloop the function is crucial as it starts the event loop that keeps the window open and responsive to user interactions.
Setting Window Properties
You can enhance the main window by setting its title and dimensions:
pythonCopy coderoot.title("My Tkinter App")
root.geometry("400x300")  # Width x Height
Widgets in Tkinter
Widgets are the building blocks of any GUI application. Tkinter provides a variety of widgets, each serving a different purpose. Some of the most commonly used widgets include:
- Labels: Used to display text or images.
- Buttons: Used to trigger actions when clicked.
- Entry: Allows users to input text.
- Canvas: A drawing area for creating graphics.
- Frame: A container to group and organize other widgets.
Example: Using Basic Widgets
Here’s an example that incorporates a label, an entry field, and a button:
pythonCopy codeimport tkinter as tk

def on_button_click():
    label.config(text="Hello, " + entry.get())

# Create the main window
root = tk.Tk()
root.title("Tkinter Example")

# Create widgets
label = tk.Label(root, text="Enter your name:")
entry = tk.Entry(root)
button = tk.Button(root, text="Submit", command=on_button_click)

# Arrange widgets using grid layout
label.grid(row=0, column=0, padx=10, pady=10)
entry.grid(row=0, column=1, padx=10, pady=10)
button.grid(row=1, column=0, columnspan=2, pady=10)

# Run the Tkinter event loop
root.mainloop()
In this example, the label, entry, and button widgets are created and placed in the window using the grid layout manager. The on_button_click function updates the label’s text with the input from the entry field when the button is clicked.

Layout Management in Tkinter
Effective layout management is key to creating visually appealing and functional GUI applications. Tkinter provides three main layout managers: pack, grid, and place.
Pack Layout
The pack method is used to stack widgets vertically or horizontally. It’s the simplest layout manager but offers limited control over widget positioning.
pythonCopy codelabel.pack(side=tk.TOP, padx=10, pady=10)
entry.pack(side=tk.TOP, padx=10, pady=10)
button.pack(side=tk.TOP, padx=10, pady=10)
Grid Layout
The grid method arranges widgets in a grid of rows and columns, allowing for more precise control over layout.
pythonCopy codelabel.grid(row=0, column=0, padx=10, pady=10)
entry.grid(row=0, column=1, padx=10, pady=10)
button.grid(row=1, column=0, columnspan=2, pady=10)
Place Layout
The place method positions widgets at specific x and y coordinates. It offers the most control but requires manual adjustment for each widget.
pythonCopy codelabel.place(x=10, y=10)
entry.place(x=150, y=10)
button.place(x=10, y=50)
Events and Event Handling
In GUI applications, responding to user actions such as clicks, key presses, or mouse movements is crucial. Tkinter uses an event-driven model to handle these interactions.
Binding Events
You can bind functions to events using the bind method. Here’s an example of handling keypress events:
pythonCopy codeimport tkinter as tk

def on_key_press(event):
    print("Key pressed:", event.char)

root = tk.Tk()
root.bind("<Key>", on_key_press)
root.mainloop()
In this example, the on_key_press function is called whenever a key is pressed while the window is active. The event object contains information about the key press, such as the character pressed.
Common Events
- Button Clicks: Use
commandinButtonorbindfor more control. - Key Presses: Bind using
<Key>or specific keys like<Return>. - Mouse Movements: Bind using events like
<Motion>or<Button-1>for clicks.
Advanced Features of Tkinter
Tkinter supports more than just basic widgets and layouts. As you develop more complex GUI applications, you might need additional features such as dialogs, menus, and custom widgets.
Using Dialogs
Dialogs are pre-built windows that prompt the user to input or provide information. Tkinter provides several built-in dialogs:
Message Box
pythonCopy codefrom tkinter import messagebox

def show_message():
    messagebox.showinfo("Information", "This is a Tkinter message box")

button = tk.Button(root, text="Show Message", command=show_message)
button.pack()
This code displays an information message box when the button is clicked.
File Dialog
File dialogs allow users to select files or directories. Here’s how to open a file dialog:
pythonCopy codefrom tkinter import filedialog

def open_file():
    file_path = filedialog.askopenfilename()
    print("Selected file:", file_path)

button = tk.Button(root, text="Open File", command=open_file)
button.pack()
Adding Menus
Menus provides a way to organize commands in a GUI application. Tkinter allows you to create menus and attach them to the main window.
Example: Creating a Simple Menu
pythonCopy codemenu = tk.Menu(root)
root.config(menu=menu)

file_menu = tk.Menu(menu)
menu.add_cascade(label="File", menu=file_menu)
file_menu.add_command(label="New")
file_menu.add_command(label="Open")
file_menu.add_command(label="Save")
file_menu.add_separator()
file_menu.add_command(label="Exit", command=root.quit)
This code creates a “File” menu with several commands and adds it to the main window.
Creating Custom Widgets
Sometimes, the built-in widgets might not meet all your needs. You can create custom widgets by extending existing ones or combining multiple widgets.
Example: Custom Widget
pythonCopy codeclass CustomLabel(tk.Label):
    def __init__(self, parent, text):
        super().__init__(parent, text=text, bg="lightblue", fg="black")
        self.bind("<Button-1>", self.on_click)

    def on_click(self, event):
        self.config(bg="yellow")

label = CustomLabel(root, text="Click Me!")
label.pack()
In this example, CustomLabel is a custom widget derived from Label. It changes its background color when clicked.
Building a Full Tkinter Application
To illustrate a more complete application, let’s build a simple text editor using Tkinter. This text editor will allow you to create, open, edit, and save text files.
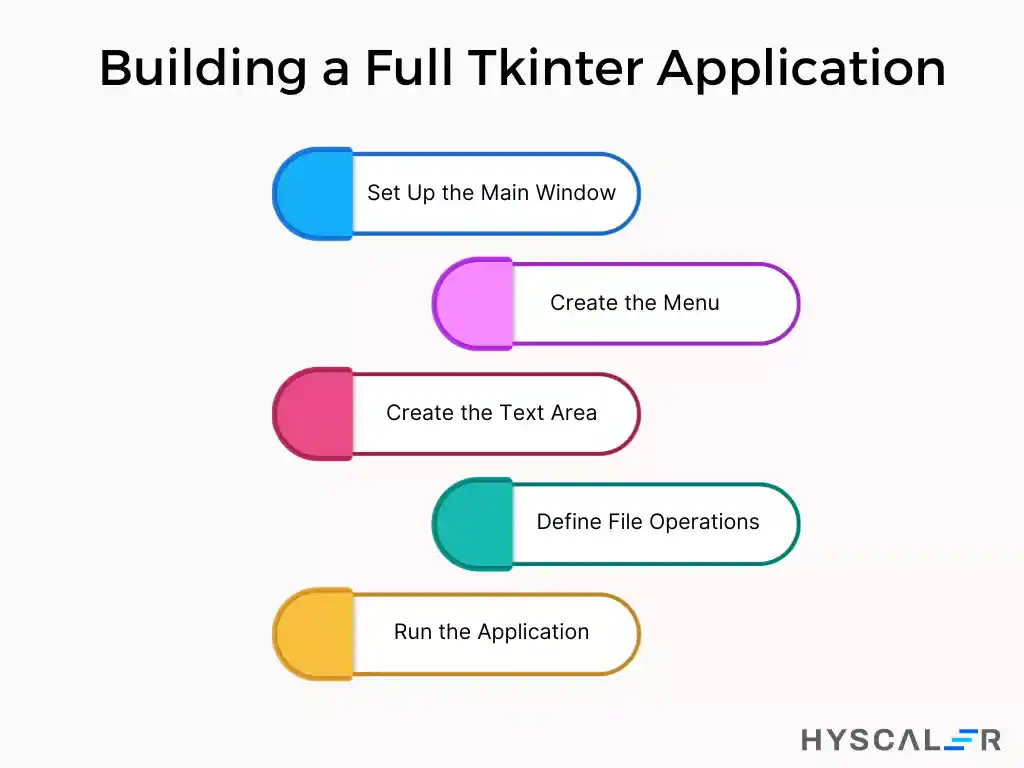
Step-by-Step Guide
1. Set Up the Main Window
pythonCopy codeimport tkinter as tk
from tkinter import filedialog, messagebox

root = tk.Tk()
root.title("Simple Text Editor")
root.geometry("600x400")
2. Create the Menu
pythonCopy codemenu = tk.Menu(root)
root.config(menu=menu)

file_menu = tk.Menu(menu, tearoff=0)
menu.add_cascade(label="File", menu=file_menu)
file_menu.add_command(label="New", command=lambda: text_area.delete(1.0, tk.END))
file_menu.add_command(label="Open", command=lambda: open_file())
file_menu.add_command(label="Save", command=lambda: save_file())
file_menu.add_separator()
file_menu.add_command(label="Exit", command=root.quit)
3. Create the Text Area
pythonCopy codetext_area = tk.Text(root, wrap='word')
text_area.pack(expand=1, fill='both')
4. Define File Operations
pythonCopy codedef open_file():
    file_path = filedialog.askopenfilename()
    if file_path:
        with open(file_path, 'r') as file:
            text_area.delete(1.0, tk.END)
            text_area.insert(tk.END, file.read())

def save_file():
    file_path = filedialog.asksaveasfilename(defaultextension=".txt",
                                             filetypes=[("Text files", "*.txt"), ("All files", "*.*")])
    if file_path:
        with open(file_path, 'w') as file:
            file.write(text_area.get(1.0, tk.END))
5. Run the Application
pythonCopy coderoot.mainloop()
Full Source Code
Combining the above steps, here’s the complete code for a simple text editor:
pythonCopy codeimport tkinter as tk
from tkinter import filedialog, messagebox

def open_file():
    file_path = filedialog.askopenfilename()
    if file_path:
        with open(file_path, 'r') as file:
            text_area.delete(1.0, tk.END)
            text_area.insert(tk.END, file.read())

def save_file():
    file_path = filedialog.asksaveasfilename(defaultextension=".txt",
                                             filetypes=[("Text files", "*.txt"), ("All files", "*.*")])
    if file_path:
        with open(file_path, 'w') as file:
            file.write(text_area.get(1.0, tk.END))

root = tk.Tk()
root.title("Simple Text Editor")
root.geometry("600x400")

menu = tk.Menu(root)
root.config(menu=menu)

file_menu = tk.Menu(menu, tearoff=0)
menu.add_cascade(label="File", menu=file_menu)
file_menu.add_command(label="New", command=lambda: text_area.delete(1.0, tk.END))
file_menu.add_command(label="Open", command=open_file)
file_menu.add_command(label="Save", command=save_file)
file_menu.add_separator()
file_menu.add_command(label="Exit", command=root.quit)

text_area = tk.Text(root, wrap='word')
text_area.pack(expand=1, fill='both')

root.mainloop()
Conclusion
Tkinter provides user-friendly GUI Applications and a powerful framework for creating GUI applications in Python. This guide covers the basics of Tkinter, including setting up the main window, using widgets, managing layouts, handling events, and exploring advanced features like dialogs, menus, and custom widgets.
Key Takeaways
- Tkinter is Easy to Learn: Its simplicity makes it ideal for beginners while still powerful enough for more complex applications.
- Comprehensive Widget Support: Offers a wide range of widgets and tools to build functional and visually appealing applications.
- Event Handling: Provides robust mechanisms to handle user interactions effectively.
- Advanced Features: Includes support for dialogs, menus, and custom widgets to enhance the functionality of applications.
By mastering these fundamental concepts, you can create intuitive and interactive GUI applications that enhance the user experience and functionality of your Python programs. For further exploration, refer to the Tkinter documentation for more in-depth information and examples.